The Exposure Triangle: How to Use it to Create Better Photos with Your DSLR Camera

Have you ever heard of the exposure triangle? It sounds a little like a math equation, let me explain.The exposure triangle stands for three elements affecting the exposure of a photograph. If you're struggling with how to shoot in manual mode, use the exposure triangle as a guide to help you. You can change each one of these variables with your camera to create a different effect.These three elements of a photograph are:
Aperture (learn more about aperture here!)
Shutter Speed
ISO
So let's break down these three elements a little further to understand how each affects your photos.
Aperture (learn more about aperture here!)
Shutter Speed
ISO

Aperture
Aperture, also known as an F-stop, is how large of an opening you let light through in your photo.A stop refers to doubling or halving the amount of light making up an exposure. Adding a stop of light by doubling the exposure will brighten an image. Decreasing by one stop or halving the exposure will darken an image.
Related post:What is aperture? | A Beginner's guide to understanding aperture
Here's a few examples of f-stops you may see on your camera:
f/1.4
f/2
f/2.8
f/4
f/5.6
f/8
f/11
f/16
f/22
So here's the confusing part. The smaller the f-stop number (think f/1.4), the larger the aperture. Seems kind of backwards right? This illustration will help you make the connection.

So the next time you're wondering which aperture to use in any given lighting situation just think the opposite.
Is it super bright out? Stick to a smaller aperture (f-stop numbers high like 4 and above). Is it just before sunset and the light is beginning to dim? Use a larger aperture (f-stop with smaller numbers like 2.8 and below).
An important thing to note here is your aperture is entirely dependent on the type of lens you're using. This is why it's important to invest in quality glass.
You'll notice most kit lens you receive with your camera don't go past f/4. This makes it challenging to shoot in low light situations or at night unless you lose a tripod. The larger the aperture (from f/2.8 down to f/1.4), the more light your lens will allow in to capture those night scenes.
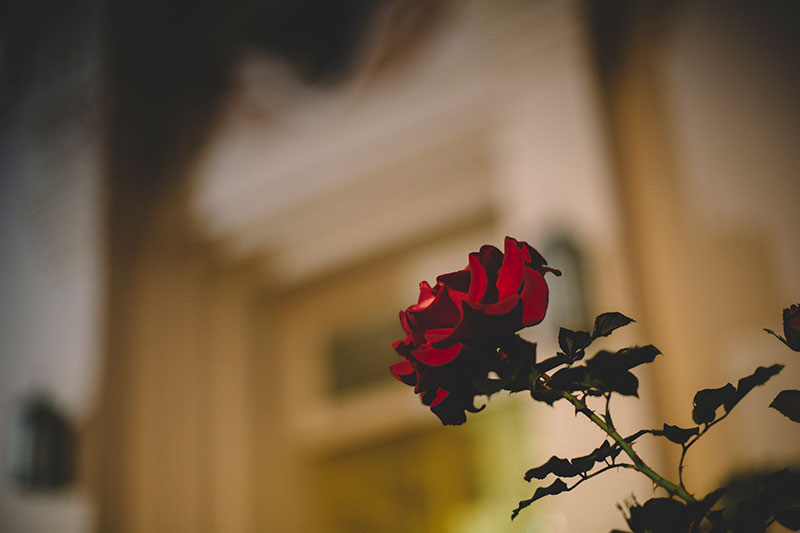
A nice side effect of larger apertures (low f-stop numbers) is that creamy bokeh effect. Want to make your subject pop while the background fades beautifully behind? Then use those lower f-stop numbers. Here's an example where the red rose is the subject in focus while the building is blurred into the background.
On the other hand, if you want your whole scene to be sharp and crystal clear in focus then use a smaller aperture (large f-stop numbers). Notice how the whole scene is in focus in this example. You can see details in the grass and the Painted Ladies in the foreground as you can with San Francisco in the background.

Shutter speed
Shutter speed refers to the amount of time the shutter is open. It's measured in seconds or fractions of a second. The bigger the denominator, the faster the feed. Example: 1/1000 is a much faster shutter speed than 1/30.
Unless you're using a tripod you'll most likely want to stay above 1/60 or 1/125 to be safe.When you're wondering what shutter speed to use think about the movement of your scene. The best example I can use to explain this is if you're capturing a waterfall.
If you want to freeze the water you'll use a higher shutter speed (think 1/1000 and above). If you want to create motion blur where the water looks silky smooth, you'll want to have a lower shutter sleep (think 1/15). Here's an example of a waterfall I shot using a lower shutter speed to show the motion blur of the water.

But again, remember you'll need something to stabilize your camera like a tripod otherwise your whole image will be blurry if you go beyond 1/125 while handholding your camera.
You can also create some interesting effects at night with low shutter speeds. This is called lightpainting when you use light to essentially "paint" while the the shutter of your camera is open. Here are more photos of lightpainting with the pixelstick.
ISO
Back in the days of film photography ISO was how sensitive film was to light. It's measured in numbers like 100, 200, 400, 800, and so on. You actually had to choose one for a whole roll of 36 exposures. Now we're lucky to have the option to change for each photo.
The lower the number, the lower the sensitivity of the film and the finer grain. And the reverse, the higher the number the more noticeable the grain.
In general, lower ISOs are used for bright, sunny days and higher ISO for darker situations like at night.
A note to remember: the higher the number (say 3200) the noisier or grainier the image will appear. Most people don't like this look but it can create an interesting affect if it's part of your style.
Here's an example of a photo I took in San Francisco at night with a super high ISO. It has that old school, vintage vibe I love to create in my photos.
